» Uncategorized Posts

get_hitstun_formula

Returns the resulting amount of hitstun a player would get if they were hit with the specified stats. Note that hitstun is not hitstop; Hitstun is how long the player remains inactionable after being hit.

ArgumentTypeDescription
player damage:realThe current damage of the target before being hit
player knockback_adj:realThe target's knockback multiplier, usually under knockback_adj
KB mulitplier:realThe general KB multiplier, usually defined by match settings
hitbox damage:realThe amount of damage the hitbox deals
hitbox BKB:realThe hitbox's base knockback value
hitbox KB scale:realThe hitbox's knockback scaling

Example, called from article1_hit.gml:

// This simulates hitstun in an article as if it were a player, to be used elsewhere:
hitstun = get_hitstun_formula(damage, knockback_adj, 1.0, enemy_hitboxID.damage, enemy_hitboxID.kb_value, enemy_hitboxID.kb_scale);

Attack Names

Use these names when naming attack sprites and attack hurtbox sprites. For example, your dash attack should consist of dattack_strip10.png and dattack_hurt_strip10.png.

jab
dattack

nspecial
fspecial
uspecial
dspecial

fstrong
ustrong
dstrong

ftilt
utilt
dtilt

nair
fair
bair
dair
uair

taunt

These names should also be used when naming the default attack scripts, but any other scripts in the attacks folder will also be executed regardless of name, so you can have scripts like dspecial_air, fstrong2, or downward_angled_ftilt.

Animation Names

These are the names you will have to use when naming your sprites. For example, to automatically replace the double jump animation with a 9 frame sprite, you will name the sprite doublejump_strip9.png. Other names than those listed are acceptable for sprites, but will not be automatically used for any states.

idle
walk
walkturn
jump
jumpstart
walljump
to align this sprite to the wall correctly, the origin should be 22px from the edge of the sprite
doublejump

airdodge
airdodge_forward
airdodge_back
airdodge_up
airdodge_upforward
airdodge_upback
airdodge_down
airdodge_downforward
airdodge_downback
if any of the directional airdodge animations are not included, it will just use the normal “airdodge” animation instead

plat
used for the respawn platform. the origin should be at the top-center of the platform

dash
dashstart
dashstop
dashturn

land
landinglag
waveland
pratfall
crouch
tech
roll_forward
roll_backward
parry

hurt
bighurt
hurtground
bouncehurt
spinhurt
uphurt
downhurt
if any hurt animations are missing, it will just use the normal “hurt” animation instead

[attackname]
[attackname]_hurt
attack names list

Buddies’ Animation Names

idle
run
wait
ledge
taunt
turn

Sprites

A sprite should be a strip of animation frames, sequenced one after another from the left to the right. All frames should have the same dimensions. Sprites should be named in the following pattern: [name]_strip[frames].png. For example: walk_strip8.png, telling the parser the animation has 8 frames.

To convert a gif into a sprite sheet, you can either use Game Maker to import and export it as a .png or use an online converter like this one (use the “Stack Horizontally” option to make sure everything is on a single row).

If you want the sprite to replace one of the existing character states without any scripting, you should name it accordingly.

Hurtbox sprites for non-attack states (_hurtbox, _crouchbox, _hurtbox_air, _hitstun_hurtbox) use rectangular collision. Hurtbox sprites for attacks (_hurt sprites) use precise collision instead.

The origin for all sprites is set to top left (0, 0) by default. To help place origins correctly, use the Rivals Workshop Helper.

You can directly reference any custom sprite by calling sprite_get( name:string ) in animation.gml. For example, forcing walk animation to use the dash sprite instead:

if (state == PS_WALK) {
sprite_index = sprite_get( "dash" );
}

(reference on available player states).

You can also change offset and bounding boxes for your sprites in load.gml. For example:

// changing offset of the jump sprite to [94, 138]:
sprite_change_offset( "jump", 94, 138 );
// making it precise:
sprite_change_collision_mask( "jump", true, 0, 0, 0, 0, 0, 0 );

Hit Particles

Hit Particles have a couple differences to how normal sprites work; visit the page for Hit Particles to learn more about how to change those for your character.

Stages

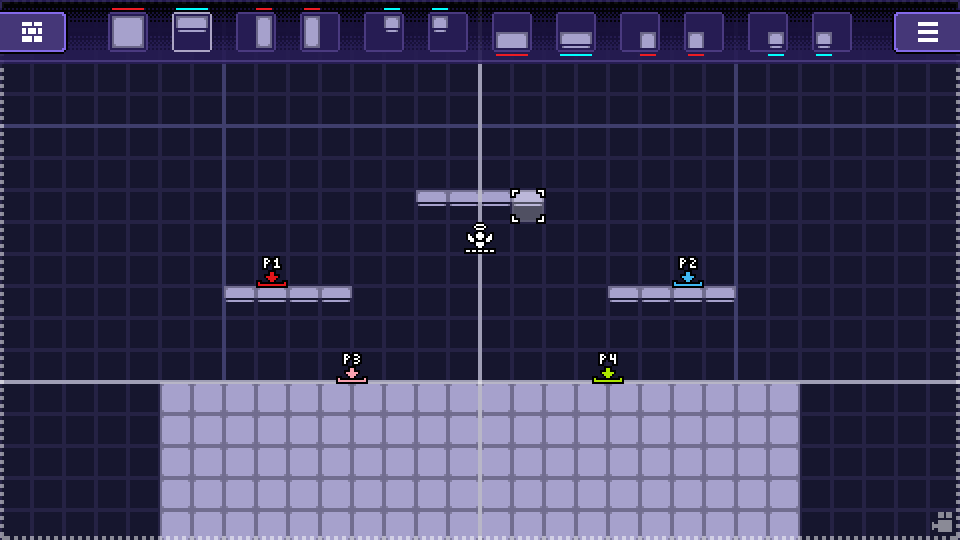
Custom stages can be created directly in the game’s Stage Editor by selecting (+ NEW STAGE) in the Workshop menu. There are two types of custom stages:

  • Standard stages – Allows you to use in-game assets to create a tiled stage quickly and easily. Ideal for prototyping your layouts before turning them into a fully-featured Advanced stage.
  • Advanced stages – Allows you to skin your creations with custom graphics and more. You can change any Standard stage into an Advanced stage by toggling the setting in the editor’s Stage Parameters menu. Additionally, custom scripting is supported on Advanced stages.
Blank Advanced Stage Template

Advanced custom stages are structured similarly to other custom items, with config.ini and the following folders: /sprites and /sounds. You can read more about this structure on the introduction page, use the default blank stage template in the editor program, or reference Bamboo Lodge (our official example for an Advanced Stage).

For Advanced stages, the core stage folder should also include:

  • preview.png [any size, but 16:9 aspect ratio, 960×540 recommended] – used in the preview window on the Steam Workshop website.
  • thumb.png [56x40px] – used for the in-game stage select menu.
  • thumb_big.png [242x130px] – displayed in the large preview window when hovering over a stage in the stage select menu.

Background Graphics

Advanced stages support a total of 9 image layers including 1 ground layer, 2 foreground (FG) layers, and 6 background (BG) layers.

The image files are automatically detected in the /sprites directory upon loading the stage, using the following naming format: bg#_strip#.png, where “bg#” denotes the layer number and “strip#” denotes the number of animation frames the image contains.

By default, all graphics (aside from ground_strip#.png) are positioned at the absolute center of the stage, but this can be changed by adjusting the Offset X and Offset Y options in the editor’s Stage Parameters menu.

In Aether mode, stages will use image files that have the prefix “a_” if one exists, otherwise using the normal version. For example, you can override the ground layer’s image in aether mode by adding a file named “a_ground.png”.


In order to conserve texture memory and ensure smooth performance, it is recommended that you use smaller background graphics combined with the BG-Tiling option in the editor’s Stage Parameters menu.

Background Music

Custom stages have access to all stage music from the game soundtrack in the editor’s Stage Parameters menu, and also support up to 4 custom tracks like the base stages.

To add a custom track, go to the /sounds directory and add or replace music_loop.ogg with an ogg file of your choice. Additional tracks can also be included under the names music_loop2.ogg, music_loop3.ogg, and music_loop4.ogg.

The game will randomly select one of these ogg files to use as the background music when the stage begins.

Scripting

Visit the stage scripting page to learn more about writing code for Advanced stages.