News

Uploading Your Item

When all of your assets are in the correct place and you’re ready to upload to the workshop, navigate to Extras > Steam Workshop from the main menu. Make sure you have Steam overlay enabled in game to see all of the screens after submission.

If you encounter an error when uploading, refer to Steam’s error code list to narrow down the issue.

Config.ini

All workshop items (characters, stages, and buddies) need a config.ini file to indicate which type of workshop item it is. This file also provides useful information about the workshop item. If this is configured incorrectly your character cannot be uploaded.

  • type0 for character, 1 for buddy, 2 for stage
  • name – the name of the workshop item
  • description – a short description of the workshop item. This can be left blank and edited via the Steam client
  • major version – must be manually updated in the config.ini file. Displayed on the Steam workshop page, so that people can track updated subscriptions
  • minor version – automatically updates every time you upload a new version of your item. Displayed on the Steam workshop page, so that people can track updated subscriptions
  • author – will override your Steam nickname if filled
  • url – in case you want to update an item that is already loaded into Steam workshop (instead of creating a new one), provide a link to it here. Include only the id part of the link (i.e. 1875062006). You can only update an item if you are its author, and this should be empty if you are uploading a new item.
  • rivals 2 contest – if set to 1, the item will be submitted with the Rivals 2 Contest Steam Workshop tag, a requirement for submissions to our Workshop Character Creation Contest.
  • finished – if set to 1, the item will be submitted with the Finished Steam Workshop tag, marking that your item is fully playable and not a WIP
  • plural – if set to 1, the results screen will display “win” instead of “wins,” similar to how it is for Ori & Sein
  • info1 – Page 1 of additional information about a character that you can read on the character select screen
  • info2 – Page 2 of additional information about a character that you can read on the character select screen
  • info3 – Page 3 of additional information about a character that you can read on the character select screen
  • bg color – Background color shown in the character select screen, usually matching the character’s element. Accepts the following keywords:
    “red”/“fire”
    “pink”/“air”
    “blue”/“water”
    “green”/“earth”
    “none”/“aether”/“purple”
    “custom”
  • bg red – The red value of the custom background color, from 0 to 255.
    Only applies if bg color is set to “custom”.
  • bg green – The green value of the custom background color, from 0 to 255.
    Only applies if bg color is set to “custom”.
  • bg blue – The blue value of the custom background color, from 0 to 255.
    Only applies if bg color is set to “custom”.

Introduction

Looking for how to play workshop characters instead of make them? Follow these instructions to access the open beta.

Tools

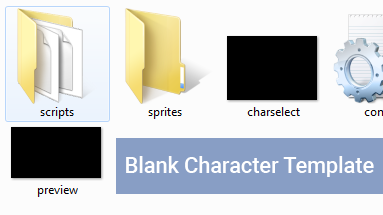
If you’d like to create your own workshop characters, we recommend you use this blank character template to start out. We also recommend GMEdit as your code editor for Rivals Workshop characters. This program was recently updated to specifically include support for Rivals Steam Workshop. To access this beta version with Rivals dialect support:

File Structure

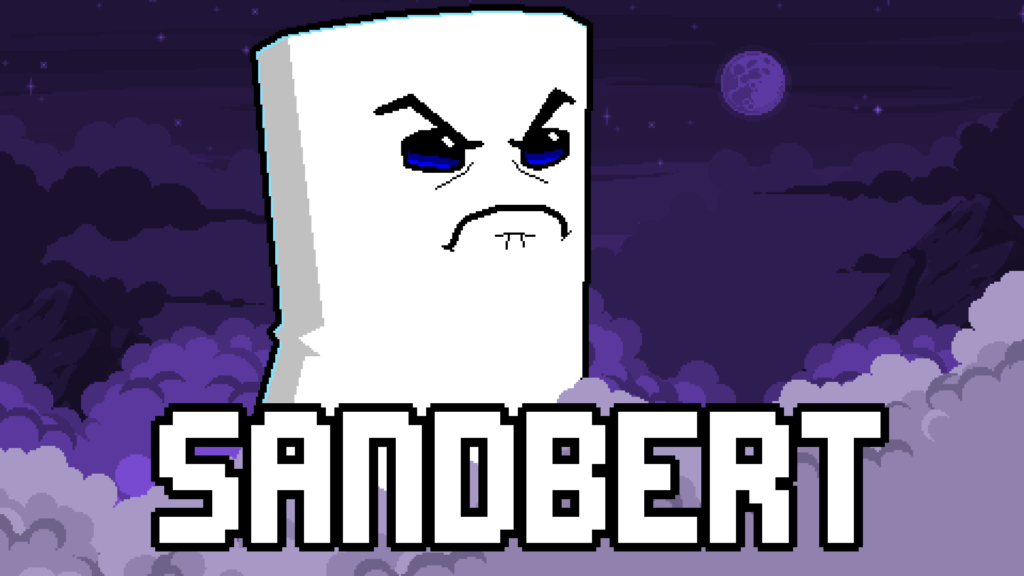
A great place to start is by taking a look at the two example characters we created. Sandbert is a good example of a simple character while Guadua goes deeper with some more exotic moves and designs.

Sandbert Workshop Download Page
Guadua Workshop Download Page

Workshop characters and stages that you are working on need their files placed within your Rivals AppData folder. Files stored locally in this working directory can even be updated during a match by pressing “F5” to apply your latest changes.

Workshop items that you subscribe to and download from the Steam Workshop are located elsewhere. To find workshop content that you’ve downloaded from Steam and move a copy into your working directory, search within:

C:\Program Files (x86)\Steam\steamapps\workshop\content\383980

and copy the character folder here:

C:\Users\{Your Account}\AppData\Local\RivalsofAether\workshop

or stage folder here:

C:\Users\{Your Account}\AppData\Local\RivalsofAether\stages

If your steam library is installed in an area that’s not the default, you can also do a search for the Rivals app ID (383980) to find Steam’s Workshop download folder. If done correctly you should now see the additional content in your game. An item itself should be packed inside a folder and should contain the following files:

  • config.ini – a file with all general info about your item. Read more→
  • /scripts folder with all the custom scripts in .gml format. Read more→
  • /sprites folder with all custom images in .png format. Read more→
  • /sounds folder with all custom sounds in .ogg format. Read more→
  • charselect.png [102x72px] – a preview for the in-game character select menu, usually with the character facing right
  • hud.png [48x32px] – used in the bottom HUD during gameplay
  • hurt.png [48x32px] – used in the bottom HUD while being launched
  • icon.png [15x15px] – used for the in-game workshop items list and various HUDs
  • offscreen.png [34x34px] – used when the player is offscreen. Use this template to make it fit inside the offscreen indicator
  • portrait.png [350x350px] – large portrait showed on Steam workshop page and on the after-match results screen
  • preview.png [any size, but 16:9 aspect ratio, 960×540 recommended] – used in the preview window on the Steam Workshop website
  • result_small.png [79x31px] – usually a cropped, flipped (to face left) version of charselect.png. Used in the results screen

Genesis 6 Wrap Up

Genesis 6 is over, and with it Season 3 of the Rivals Championship Series. As we close the book on our latest year of competitive Rivals it’s always nice to take a look at how far we’ve come. Spoilers obviously abound in this article so make sure to only give this a read if you’re happy with finding out who won Genesis.

Some of the Rivals community at Genesis 6!

Our Season 3 Champion

Congratulations to Panda Global’s FullStream for his amazing losers side run at Genesis 6 that secured him the title of RCS Season 3 Champion. On top of this being our largest live event yet, FullStream took arguably the most difficult path through the final day, making this win a true testament to FullStream’s Rivals of Aether legacy.

Left: Windows, Center: FullStream, Right: Penguin

This Genesis is also the first time a previous champion has won again, making FullStream our only 2 time champion over all 3 years of the series. We also broke some other first-time records for Rivals with a singles prize pool of over $13,000 and more than 45,000 viewers watching the finals. We can’t thank our players, community, and fans enough for making this event a piece of Rivals history.

Genesis 6 Standings

Players came from all over to compete, meet their Rivals friends, and test their skill in the RCS World Finals. Here are the standings for our top 16 competitors who all deserve a congratulations for their placings. Thanks to everyone who joined us at the event to help make Genesis 6 an event to remember.

Standing Player Character
1st PG | FullStream
2nd Penguin
3rd AF | Windows
4th BxA | MattyIce
5th Vireo.pro | CakeAssault
5th ZeeBee Kragg
7th Jesier
7th Blue
9th Kaos
9th Lord Bagel Etalus
9th TurtleBox Absa
9th DolphinBrick
13th SNT | MSB
13th hoppyKnitz
13th Chompers
13th uS | DosRogers
Full Standings >

VoDs and Highlight Videos

The majority of the event was streamed live, and you can catch the action on either ShowdownGG for days 1 and 2, or VGBootCamp for the finals. We’ve also put together some highlight videos below with the help of Youtuber JarekBloodDragon.

Top 32 Highlights

Day 1 & 2 VoDs will be available on ShowdownGG >

Top 6 Highlights

Full Finals Day VoDs on VGBC >

Event Photos

We asked our photographer from last year, FS | Xenos, to once again to capture the Rivals event. Relive (or experience for the first time) the event through his fantastic album that covers all 3 days: xenosmccloud.com/ESPORTS/RoA-Gensix

Road to Season 4

Even though season 3 is over, we have plenty in store for 2019. At Genesis we announced that season 4 is coming this summer and opening with Smash’N’Splash 5.

In the meantime we’ll have 3 events during the offseason that will serve as Road to Season 4 events.

Winning any of these events will secure you a $500 travel voucher (on top of any other winnings) towards Smash’N’Splash 5. The first event coming up is Frostbite 2019 in just 2 weeks. With a $2,000 pot bonus, a travel voucher, and more on the line this will be one you won’t want to miss.

Stage Scripting

Advanced stages can be given access to custom scripts and articles by setting the scripting parameter in its config.ini to “1”.

Stages with scripting enabled get two new tabs in addition to terrain and player spawns: Markers and Article spawners.

Markers

Markers are simply a set of immovable coordinates. They can be used in a variety of ways, such as creating a path for a moving platform to follow or arbitrary boundaries for things like goalposts or spawn areas.

To find a specific marker’s coordinates in a match, use the functions get_marker_x()  Reference→ and get_marker_y()  Reference→.

Selecting or placing one opens a small menu that lets you change the marker’s color and symbol for better organization.

Article Spawners

For more details on how stage articles themselves work, check the Articles and Stage Articles pages.

At the start of a match, article spawners will create an article that uses the script set corresponding to the spawner’s number, shown on the upper-right of its icon in the top bar. Selecting or placing one opens a menu with the following properties:

Obj Type – Whether the article is normal, a platform or a solid block.

Layout – Whether the article will spawn in both stage layouts, or is exclusive to either Aether or Basic.

Depth – The depth of the article, which determines whether it shows in front of (negative value) or behind (positive value) other layers. A depth of 0 is the ground layer.

Parallax X – The article’s horizontal parallax (only applies to normal articles)

Parallax Y – The article’s vertical parallax (only applies to normal articles)

ARG0 – ARG7 – These values will be transferred to the article’s spawn_variables array when created.

Folders

Scripted stages will detect the following additional folders: /scripts/, /scripts/attacks/, /sounds/sfx/, and /sprites/articles/.

The scripts and attacks folder behave similarly to character scripts. To see what scripts stages normally use and when they use them, check the Stage Scripts page.

The sfx folder loads sounds to be used with the sound_get function, much like the sounds folder in players. Likewise, the articles folder loads sprites for use with sprite_get.

Rule Overrides

Custom stages can also override the normal rules, accessible via the stage’s config.ini file, under the section labelled [scripting_overrides]. A value of -1 means the rule will not be overridden.

Setting the stocks override to 0 will disable stock limits entirely, and setting the time override to 0 will disable the timer. Setting teams to 1 will auto-sort every other player into opposite teams if teams were not enabled in the lobby beforehand.